The Experiment
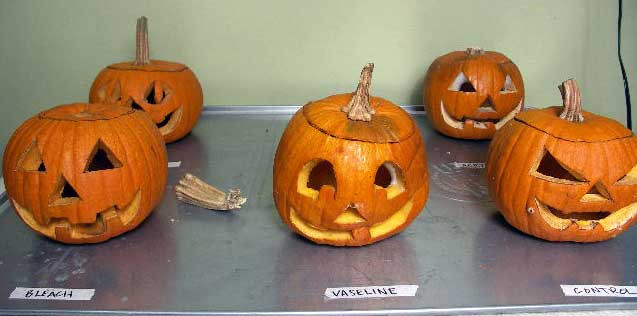
The purpose of this experiment was to test the effectiveness of various methods of preserving a carved pumpkin (jack o' lantern). We gathered some tips from various pumpkin carving resources, and also sampled a commercial spray. The results were observed over a two week period.
Cutting and Carving
We chose 6 carving pumpkins of approximately the same size, shape and weight (around 2.5 lbs). One method required soaking the prepared pumpkin in a bleach solution for several hours, so we carved that pumpkin 8 hours before the others and started it soaking. The other 5 pumpkins were all carved and treated within the same time frame.
When prepping the pumpkins for carving, we endeavored to remove as much of the pumpkin pulp as was possible, so the inside flesh of the pumpkin would be dry and provide a uniform surface for topical application of the preservative treatments.
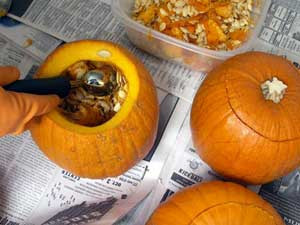
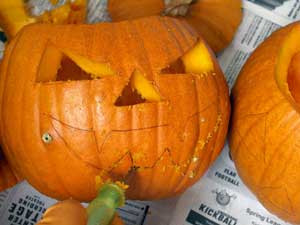
As we carved the jack o’ lanterns, we tried to make each one distinctive to allow easier differentiation, but we also attempted to remove a comparable amount of material from each pumpkin and leave a similar area of exposed pumpkin flesh in the excised regions. In the interest of time, and to simulate an average jack o’ lantern, we kept our designs fairly basic.
We noted at this point that there was some variation in the thickness of the walls from pumpkin to pumpkin, ranging from about ¾” to 1”. This factor may have played some role in our later results.
Dunking, Spraying, and Smearing
We tested five methods of pumpkin preservation, along with a control. The control pumpkin was simply carved and untreated. Explanations of the treatment methods and their rationales are below.
Bleach
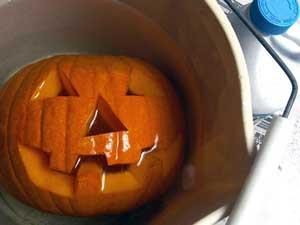
The pumpkin was soaked in bleach solution (1 tsp. bleach/gallon water) for 8 hours. Thereafter it was sprayed daily with a mild bleach solution. The soaking and spraying is intended to hydrate the pumpkin flesh, while the bleach is an antimicrobial.
Pumpkin Fresh
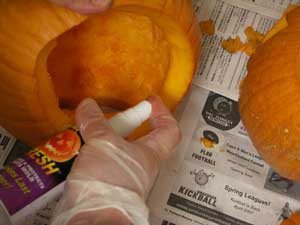
We sprayed the pumpkin daily with commercial pumpkin preservative Pumpkin Fresh, as directed on bottle. The solution contains water, sodium tetraborate decahydrate (borax), and sodium benzoate (a preservative and fungicide). The label describes it as a “fungicidal solution”.
White glue
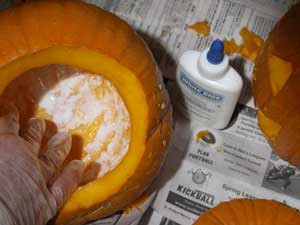
We coated the inside and cut surfaces with white glue. The dried glue is intended to seal the pumpkin, preventing dehydration.
Vaseline

The pumpkin was coated on the inside and cut surfaces with petroleum jelly. This is intended to keep the pumpkin flesh from dehydrating.
Acrylic spray
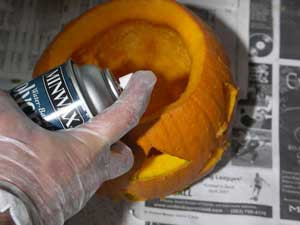
Carved pumpkin was sprayed with acrylic finish spray. The spray is intended to seal the pumpkin flesh, preventing dehydration and acting as a barrier to mold growth.
All of the treatment methods endeavor to lengthen the life of the carved pumpkin by preventing dehydration (through sealing the cut surfaces or hydrating them with liquid) and by inhibiting mold growth (by providing a barrier to mold growth or through application of an antifungal agent). While the goals of the treatments were similar, their effectiveness varied dramatically, and some of our results were unexpected.
After carving and treatment, all of the pumpkins were placed in an indoor location with a stable temperature of 62 to 64 degrees F. They were observed for a period of 14 days, and were photographed daily to record changes.
Pumpkins Aplenty
After 24 hours, some changes were already apparent. The control pumpkin was showing some drying, curling and slight softening of the flesh along the cut areas, especially the mouth. The pumpkin treated with white glue also seemed to be softening very slightly. The other pumpkins were all firm and appeared unchanged.
After 48 hours, the first spots of mold had appeared. There were a few small spots of mold inside the control pumpkin, and one very small spot in the Pumpkin Fresh pumpkin. On day 3, all but one of the pumpkins was showing some evidence of mold. The control pumpkin had several mold spots and was beginning to attract fruit flies. Out of all of the pumpkins, the bleach-treated on appeared the best, with the flesh still very firm and virtually mold-free. The others were slightly softened, and the glue-treated pumpkin was noticeably softening.
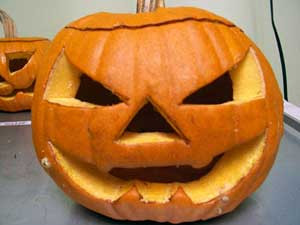
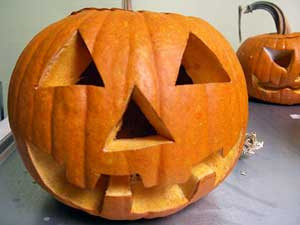
Control - Day 6
Bleach - Day 6
Over days 4 and 5, the pumpkins seemed to stabilize and we saw little change. On day 6 the control pumpkin was developing patches of fuzzy mold, while the acrylic and Vaseline pumpkins had one small fuzzy patch each. The white glue pumpkin was starting to look bad, with profuse mold spots and serious softening. Meanwhile, the Pumpkin Fresh and bleach pumpkins still looked pretty good, although the Pumpkin Fresh one was a little softer and drier appearing. The bleach pumpkin lost its stem, but this seemed to have little effect and was probably not caused by the treatment.
One Down, Five to Go
By day 7 it was clear that the glue pumpkin was in serious trouble. It was going down fast, with one eye totally fuzzed up with mold, some large rotted spots, and a mold-covered interior. A colorful burst of red had developed on the inside of the lid, possibly indicating a new species of microbe. While we’re no experts on mycology, in this specimen alone we thought we could see evidence of Aspergillus fumigatus, Aspergillus niger, Rhizomucor and Penicillium molds. We probably should have tossed it at this point, but we wanted to see how bad it could get.
Over the next few days there was a profuse explosion of mold. The acrylic pumpkin and Vaseline pumpkin developed large fuzzy patches on day 8, which blossomed over the next two days. Meanwhile, the mold and rot in the glue pumpkin had taken its toll, as it lost structural integrity and began to slump to the side. On day 9, we put it out of its misery.
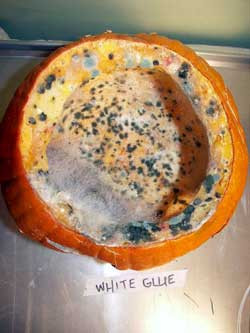
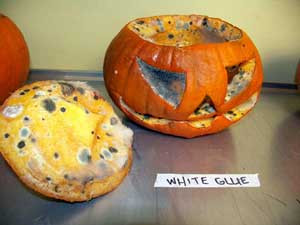
White Glue - Day 8
The other pumpkins still looked relatively good. The control pumpkin was a bit shriveled around the edges, but the flesh had developed a dry, leathery surface that seemed to be slowing the progress of mold. The Pumpkin Fresh pumpkin still had only small black spots of mold inside. The bleach pumpkin had very little actual mold inside, thanks to the bleach solution. However, there were some slimy patches forming where the bleach had killed the mold, and on day 8 a soft spot appeared on the bottom of the pumpkin, indicating that the flesh was breaking down. On the outside, though, the bleach pumpkin still looked the best.
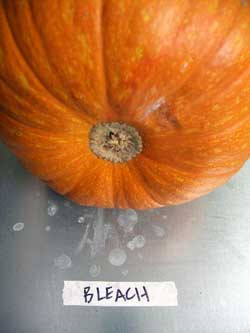
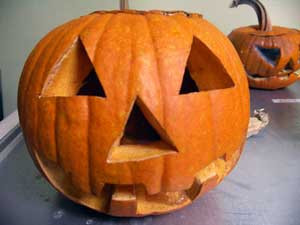
Bleach - Day 8
The Field Narrows
On day 10, it was time to say goodbye to two more of our contenders, the acrylic pumpkin and the Vaseline pumpkin. The acrylic pumpkin was filled with mold and had several large areas of soft, rotted flesh. Although the Vaseline pumpkin’s mold was mostly confined to one area, a good portion of it had rotted, and it had softened so much overall that its face was starting to collapse.
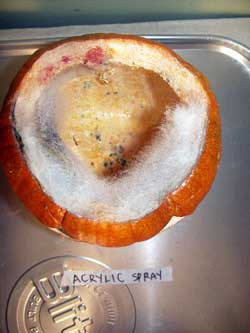
Acrylic - Day 10
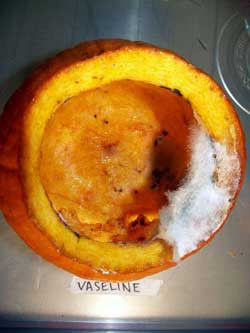
Vaseline - Day 10
The table was now cleared to three contenders, the control pumpkin, the Pumpkin Fresh pumpkin, and the bleach pumpkin. Despite the soft spot on the bottom and some slime on the inside, we cut the bleach pumpkin some slack because it was otherwise almost perfectly preserved. The Pumpkin Fresh pumpkin was pretty stable, if a little drier and softer than the bleach pumpkin, while the control pumpkin was lasting far beyond our expectations.
Pumpkin Deathmatch
The next day, however, we could no longer deny that the bleach pumpkin had a serious problem. It was listing to the side and fluid was oozing from underneath, and the bottom of the interior was slime covered. We tossed it and turned our attention to the last two survivors. The control pumpkin had several moldy areas inside that didn’t seem to be spreading very fast. The Pumpkin Fresh pumpkin, while it had little mold growing on the interior, had developed a soft slimy spot on the bottom, similar to the one that had just eaten its way through the bleach pumpkin. This was going to be interesting. Who would hold out the longest?
The next few days were filled with tension, as we watched and waited to see who would succumb first to decay. Although there were no dramatic changes in either in the way of mold, by day 12, the decayed area of the Pumpkin Fresh pumpkin had made its way from the interior to the exterior. On day 13, a small area of decay reached the outside of the control pumpkin. This was really, really close.
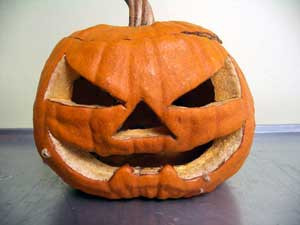
Day 14 - Control
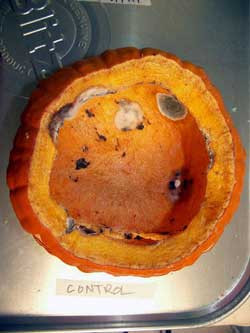
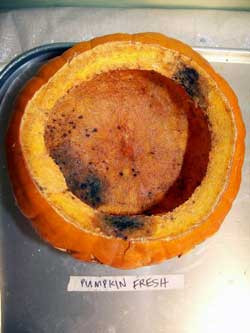
Day 14 - Pumpkin Fresh
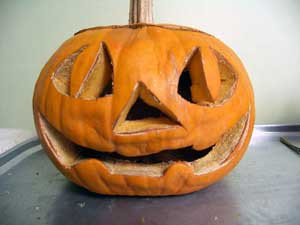
And the Winner Is.
We have to admit this was a tough race to call. The Pumpkin Fresh pumpkin had very little overt mold growth and the interior looked pretty clean, while the control pumpkin had several large mold spots inside. When it came to actual decay, however, the Pumpkin Fresh pumpkin had more rot - two small spots of rot that extended all the way through the pumpkin wall, and one large area on the bottom, while the control pumpkin had only one small spot that had decayed all the way from cavity to exterior. On the outside, the pumpkins both looked kind of haggard, with the control slightly more leathery, and the Pumpkin Fresh pumpkin crumpling in places.
In the interest of fairness, we considered all three factors in making our final judgment: preservation of appearance, inhibition of mold, and prevention of decay. We felt that the amount of mold in the control pumpkin was balanced by the amount of rot in the Pumpkin Fresh pumpkin, and they both looked bad in their own way. For those reasons, we're declaring this a draw between Pumpkin Fresh and the control. We have to say that the pumpkins were both pretty gross, and in practice you would probably want to throw them both out.
Pumpkin Postmortem
Our findings in this experiment were surprising to us. It seemed that some of the so-called preservation methods recommended for pumpkins actually accelerated their decay. This was particularly evident in the white glue treatment. We suspect that the glue may have provided a medium that nourished the mold and encouraged it to flourish.
The Vaseline and acrylic treatments, intended to keep the pumpkin from dehydrating, seemed to work for about a week, after which the pumpkins degraded rapidly. It is possible that these chemical treatments broke the pumpkin flesh down and made it more vulnerable to mold and decay. It should also be noted that all three of these pumpkins had slightly thinner walls (3/4”) than the other three pumpkins (1”). It is possible this may have been a factor in how quickly rot penetrated the pumpkins and how quickly they decayed. However, even when they had significant areas of rot, none of the thicker pumpkins saw an explosion of mold growth as was seen in these examples.
The bleach treatment was promising and initially seemed to yield the best results overall. However, while it inhibited mold effectively, it did not prevent rot from setting in. It is possible that pooling of bleach solution in the bottom of the pumpkin cavity contributed to decay in this area. If we were to repeat the experiment, we would invert both the Pumpkin Fresh and bleach pumpkins after spraying and allow them to dry thoroughly, as we suspect pooled moisture may have affected both their results. At any rate, while both the bleach and Pumpkin Fresh treatments were effective in inhibiting mold growth, mold was still able to attack the pumpkin flesh enough to damage it and make it vulnerable to decay.
The longevity of the control pumpkin was unexpected, as we anticipated it to be the first to go. Although it initially developed mold rapidly, the pumpkin flesh dried enough to form a leathery surface that prevented the mold from spreading quickly. The control pumpkin’s natural “self-healing” ability made a good case for doing nothing. However, the pumpkin did take on a distinctive shriveled look.
Summary of Results
White glue – Preserved pumpkin for 6 days. Profuse mold and rot.
Acrylic spray – Preserved pumpkin for 9 days. Profuse mold and rot.
Vaseline – Preserved pumpkin for 9 days. Profuse mold and rot.
Bleach – Preserved pumpkin for 10 days. Minimal mold, some rot.
Control – Preserved pumpkin for 14 days. Minimal rot, some mold.
Pumpkin Fresh – Preserved pumpkin for 14 days. Minimal mold, some rot.
Our Recommendations
Based on our findings in this experiment, we can confidently say that white glue is not an acceptable pumpkin preservative. Apart from that, we think the pumpkin preservation method you choose should be dictated by your goals and the nature of your jack o’ lantern.
If you have an elaborate creation that you want to keep looking pristine for as long as possible, we recommend using either the bleach treatment or acrylic spray or hairspray (commonly used by expert pumpkin carvers). Your pumpkin’s life may not be as long overall, but it will look good while it lasts. If you want to keep it looking OK for a week or less, Vaseline may suffice.
For maximum pumpkin life, Pumpkin Fresh spray seems to be effective for inhibiting mold growth and slowing decay. It is also expensive, at $4.95 per bottle plus shipping (we went through nearly two bottles in two weeks, for a small pumpkin). Although the spray will extend your pumpkin’s life, the carving will show some shrinkage and age externally. Another benefit of the spray is that it is nontoxic and biodegradable, which makes it more convenient to use than bleach, and means you can compost your pumpkin. Since one of the main ingredients of the spray is borax, it would be interesting to see how effective a homemade borax and water solution would be.
Finally, you may want to do nothing. Just keep your carved pumpkin in a dry and temperature stable location. Exposure to the elements, such as rain and freezing temperatures, will damage your pumpkin and encourage decay. Our experiment showed that doing nothing was surprisingly effective and preserved the pumpkin for about as long as the commercial spray, although it was slightly moldier and drier. If you’re not too concerned about your pumpkin shriveling a bit, this may be your best option.
A Pillowcase and the Ultimate Halloween Haul
Other experiments:
Does Viagra Keep Flowers from Wilting?
The Cheney Shotgun Experiment
What is the Ultimate Jello-Shot?
How to Light a Jell-O Shot on Fire
How To Keep Beer Cold